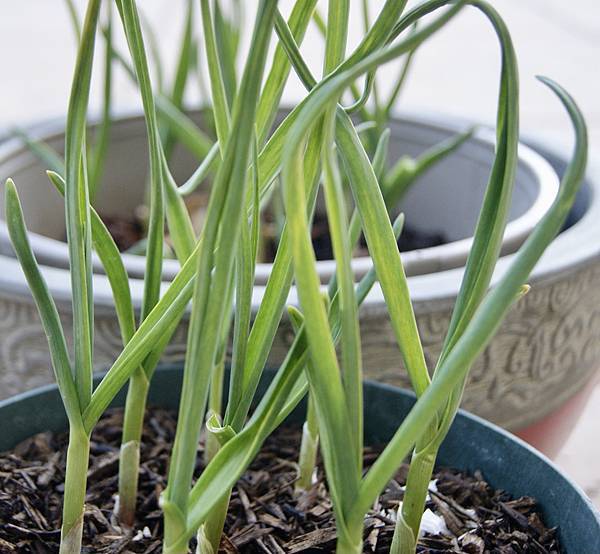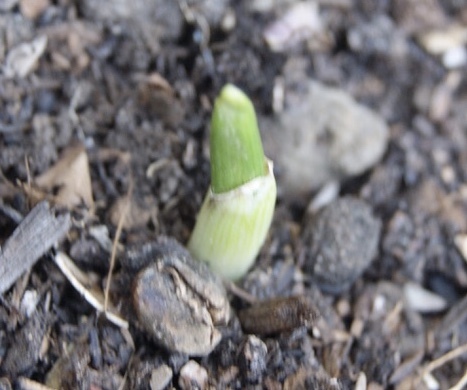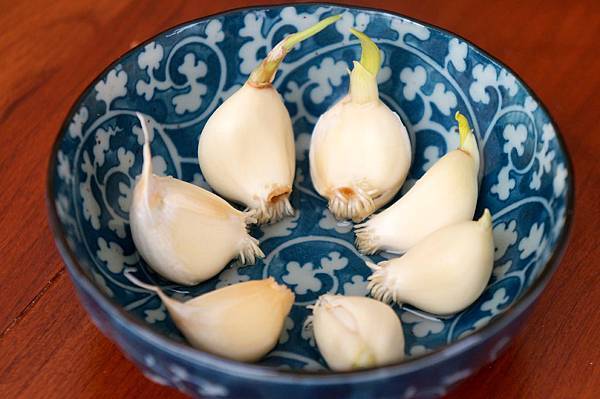
秋天是最佳的栽種時間,挑選健康(Make sure there are no signs of disease, marks or soft spots)肥大壯碩的有機大蒜,將外層紙般的薄膜去除後,分成數小瓣,只栽種大瓣的大蒜,才能夠有好的收成。

栽種於陽光充足的地方,喜排水良好肥沃有機肥的土壤humus-rich soil (add worm castings, homemade compost, humus, well rotted manure or blood & bone plus a balance of nutrients)。

秋天的時候用筷子每隔3吋的地方挖個洞,將一瓣的大蒜平面(根部)朝下埋入土中,上層在覆蓋約1-2吋的土。上面再覆蓋密密的稻草或木屑,以防止雜草叢生,此時充分澆水以保持濕潤的土壤,準備春天的長大茁壯和夏天的收成。

一球的大蒜先將外層的薄膜去除,輕輕地掰開一瓣一瓣的大蒜,尖端朝上放入淺淺的一層水中,浸泡一夜,很神奇的白白的根就冒出來了。
Anne Gibson的詳細解說:
© Copyright Anne Gibson, The Micro Gardener 2010-2013 – http://www.themicrogardener.com. All rights reserved.
- To prevent rotting in the soil, here’s a little tip: soak your cloves in a glass jar with equal quantities of baking soda to organic liquid seaweed for 2 hours. e.g. for 8-10 cloves (1 average bulb) = 1 tblspn baking soda: 1 tblspn seaweed. Increase quantity depending on number of cloves you’re planting.
- Choosing Varieties: Soft neck varieties braid and store well; produce 12-13 cloves/head but have no flower stem and suit warm climates with mild winters. One of the best varieties for our subtropical zone is ‘Glen Large’. Hard neck garlic types send up a hard, flowering stem so are less suitable for braiding, are milder tasting but have a shorter shelf life as they have less layers of skin around the bulb. Elephant or Russian garlic is not a true garlic (known as a bulbing leek and has a milder flavour).
- Companion Planting: Garlic helps improve the health and growth of other plants including raspberries, beetroot, strawberries, tomatoes, lettuce, summer savoury & roses. On the flip side, never plant garlic near peas or beans. I’ve seen this in practice (even with chives & spring onions near bean plants) and they just won’t be friends so don’t waste your time and money!
Garlic is a member of the Allium family (onions, leeks, chives, shallots) so companion planting rules apply to all those family members.
- Location: Good crop rotation practices help prevent diseases so avoid planting garlic where you’ve grown members of the Allium family in the last couple of years. If you have to reuse a pot, add fresh potting mix
- Press down very firmly as you back fill with soil (to avoid the bulbs being pushed out after a few days as the roots start to develop). Check at this stage and reposition them back into line! Water in well with liquid seaweed. When the shoots are about 5cm/2in high, add mulch thickly to suppress weeds.
- Distance between rows: 30cm/12in. Yields: 1m2/3ft2 can produce 52 garlic bulbs – one for every week of the year.
- Container planting: Garlic grows 40-60cm/15-24in high depending on the variety and although you may not get as large bulbs in a pot, they are most definitely worth growing. As they are a long growing crop, interplant with fast growing lettuces and leafy greens around the outside. Pot depth should be at least 15cm
Step 4: Nurture Your Garlic
- The new shoots will appear and when they are about 15cm tall, it’s time to fertilise again with liquid nutrients.
- Every 2 weeks, I use seaweed or fish emulsion + a slurp of molasses in a watering can; worm juice (liquid from my worm farm) or compost tea. Alternating their liquid diet seems to keep my garlic babies happy.
- In between, water regularly (unless it rains) until the plant flowers (hard neck varieties) or about 1 month before harvest (soft neck). This allows bulbs to dry out and harden. I maintain adequate soil moisture of 40-50% by checking every so often with a moisture meter. Soil should be moist NOT wet.
- Most importantly keep weeds at bay (garlic has a big appetite and doesn’t like competition)
Step 5: Harvest (the fun part!)
- Keep a record of when you plant so you know the time your garlic variety is likely to mature.
- You have a window of opportunity to harvest – too soon and it will look like an onion (the segments and papery wrapper will not yet be formed).
Too late and the cloves will grow and expand so much the outer tissue paper-like wrapper will split, which will reduce bulb quality and storage life.
- As a guideline, harvest hard neck garlic when roughly 1/3 – 1/2 the leaves are brown and wilted. Harvest soft neck varieties when the bottom few leaves start dying off or the garlic falls over. If you’re not sure, pull out one bulb to test it is fully formed before harvesting the whole crop.
Avoid watering before harvesting so the bulbs are dry. Nothing worse than pulling muddy bulbs!
- Dig or gently pull up the whole plant – I don’t recommend using a garden fork or you can accidentally spear your bulb (like I did the first time!!) and watch out for earthworms that love to party around the roots.
Don’t be tempted to wash it at this stage. Dirt is GOOD! Leave it be – you can gently brush off the excess with a toothbrush after it’s cure
- Leave a few garlic heads in the soil rather than harvesting them all at this stage.
When they start to produce little green shoots, you can plant the cloves individually for your next crop. They’ll start to grow quickly as they already have roots.
- If you need flavour before your garlic is fully grown, you can still harvest immature bulbs (they’ll look more like leeks)!
- To cure your garlic, hang in a dry, airy place in the shade or on racks to dry the bulbs for a couple of weeks (up to 4 weeks in cool zones).
Never let the bulbs get wet or be in hot direct sun at this stage – move indoors or keep under cover
- They are ready for storage when the bulb is papery and crinkled.
Well cured skins will harden enough with a protective outer papery wrapper to store for 6-7 month
- Hang: When they are fully dried (press hard and if there’s no resistance they’re ready).
- Haircut: If you are going to plait the garlic, leave the leaves on, otherwise trim the tops approximately 2.5cm/1in above the bulb and snip the roots off.
How to Braid Your Garlic
- Freeze: Place individual cloves in a freezer bag. Remove as much air as possible, seal and label with the date. Store for up to 3 months. You can freeze garlic cooked or raw to use later. Whole cloves will retain their full flavour but chopped/minced raw garlic will start to develop allicin (this active ingredient is what makes it taste hot) so releasing it will give your garlic a more mellow taste. Just use a little more in the recipe if you choose to freeze, to make up for the less potent flavour when you defrost.
- Freeze minced garlic in an ice cube tray for convenient portions.
- Store in a garlic keeper or open weave basket but not near humidity or steam as this can reduce the bulb storage life.
- Storing in the fridge will reduce the flavour of your gorgeous garlic – putting it in plastic or airtight containers can produce mouldy, rotted or sprouting garlic!
Growing Tips
- Hard neck garlic varieties produce flower stems (‘scapes’) that form heads with bulbils – prune these scapes off as soon as they appear so the plant puts its energy into producing a larger garlic bulb.
- Plant garlic under roses to deter aphids.
- Ensure soil is moist for newly planted garlic so roots develop. Avoid over watering and ensure good soil drainage to prevent cloves rotting.
- If you have a problem it’s likely to be due to lack of soil preparation, management during growing, incorrect pH, choosing the wrong variety for your zone or planting at the wrong tim


 留言列表
留言列表

